
Are you tired of sweltering summers and skyrocketing energy bills? If your attic isn’t properly insulated, it could be letting heat seep into your home, making your air conditioning work overtime. Installing a radiant heat barrier can be a game-changer, keeping your space cooler and more comfortable.
Key Takeaways
- Understanding Radiant Heat Barriers: These barriers reflect radiant heat away, improving energy efficiency and comfort by keeping your home cooler, especially in hot climates.
- Energy Savings: Installing a radiant heat barrier can lead to cooling cost reductions of up to 17%, significantly lowering energy bills during summer months.
- Improved Comfort: The reflective properties help maintain consistent indoor temperatures, resulting in a more comfortable living environment for your family.
- DIY Installation: Radiant heat barriers are straightforward to install with minimal tools, making it an accessible DIY project for homeowners.
- Enhanced HVAC Longevity: Proper installation reduces heat buildup, allowing HVAC systems to run more efficiently and increasing their lifespan.
- Environmentally Friendly: By decreasing energy consumption, radiant heat barriers contribute to a smaller carbon footprint and promote a more sustainable home.
Recommended Products

Dramatically Reduce Attic Heat: Our premium radiant barrier foil installs under your roof deck, reflecting up to 95% of radiant heat to reduce attic temperatures significantly. Enjoy a cooler home during hot summers while retaining warmth in winter

1,000 SQUARE FEET PER ROLL: Our insulation foil roll measures 250 feet in length and is four feet wide. This gives you 1,000 square feet of reflective insulation roll. Studies have shown that aluminum reflective barrier can result in a noticeable temperature drop in your home during the summer. It can also help reduce cooling costs by 10% depending on your climate region.
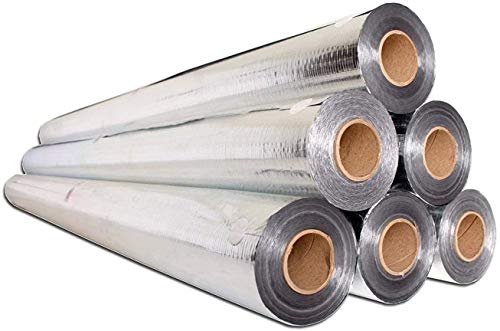
1,000 SQUARE FEET PER ROLL: Our insulation foil roll measures 250 feet in length and is 4 feet wide. This gives you 1,000 square feet of reflective insulation roll. Studies have shown that aluminum reflective barrier can result in a noticeable temperature drop in your home during the summer. It can also help reduce cooling costs by 10-45% depending on your climate region.
Understanding Radiant Heat Barriers
Radiant heat barriers are essential for improving energy efficiency in homes, especially in attics. These materials reflect radiant heat away from living spaces, keeping your home cooler and reducing reliance on air conditioning.
Recommended Products

AlUMINUM REFLECTIVE INSULATION ROLL SIZE: 48''(W) x 10Ft (L), Easy to cut that can cater to all your home or RV window sizes, sturdy and lightweight. Easy Install With Adhesive Adop

Reflective insulation for use in a crawl space, attic, wall, metal buildings and post and frame structures

EXTREMELY EFFECTIVE - Reflects 95% of radiant energy, perfect RADIANT BARRIER. R17 insulation.
What Is a Radiant Heat Barrier?
A radiant heat barrier is a type of insulation made from reflective materials, such as aluminum foil. It works by reflecting heat away from the home instead of absorbing it. You install these barriers on the underside of the roof or between the roof and attic insulation. They are most effective in warm climates, where they can significantly reduce heat gain.
- Energy Savings: Installing a radiant heat barrier can reduce cooling costs by up to 17%. This means savings on energy bills, especially during hot summer months.
- Improved Comfort: By reflecting heat away, a radiant heat barrier helps maintain a cooler indoor environment. You’ll notice less fluctuation in temperature, leading to greater comfort for you and your family.
- Enhanced Longevity of HVAC Systems: With reduced heat buildup, your air conditioning system operates more efficiently and has a longer lifespan. This translates to fewer repairs and replacements over time.
- Easier Installation: Radiant heat barriers typically require minimal tools and can be a DIY project for homeowners. Simple steps include measuring your attic space, cutting the barrier material, and securing it properly.
- Environmentally Friendly: Using less energy for cooling decreases your carbon footprint. A radiant heat barrier contributes to a more sustainable home environment by promoting energy efficiency.
These benefits make radiant heat barriers a valuable addition to your attic, enhancing both comfort and energy efficiency.
Materials Needed for Installation
For effective installation of a radiant heat barrier in your attic, gather specific materials that ensure optimal performance and ease of application.
Types of Radiant Heat Barriers
- Foil-Backed Insulation: Made from aluminum foil and commonly used in attics. This type reflects heat more efficiently due to its shiny surface.
- Reflective Paint: Applied directly to surfaces, it serves as a radiant barrier in spaces where traditional insulation isn’t feasible.
- Radiant Barrier Sheets: These sheets consist of a reflective material bonded to sturdy substrates. They provide a durable, easy-to-install option that covers larger areas.
- Reflective Membrane: Designed for larger installations, these membranes offer flexibility and function in various attic sizes and configurations.
- Utility Knife: Essential for cutting radiant barrier materials to fit your attic’s dimensions.
- Stapler: Heavy-duty staplers hold the radiant barrier in place securely against structural elements.
- Measuring Tape: Use this to ensure accurate measurements before cutting materials.
- Safety Gear: Include gloves and dust masks to protect yourself from debris and insulation particles.
- Ladder: A sturdy ladder allows safe access to your attic during the installation process.
As you prepare, ensure a clean workspace to enable smooth installation and effective sealing. Having all necessary materials and tools on hand makes the process quicker and more efficient.
Step-by-Step Guide to Installation
Follow these steps to install a radiant heat barrier in your attic effectively.
Recommended Products

AlUMINUM REFLECTIVE INSULATION SHEET SIZE: 24''W x 10 Ft (L),Easy to cut that can cater to all your window Sizes,Sturdy and lightweight. Window reflective film sun blocking.
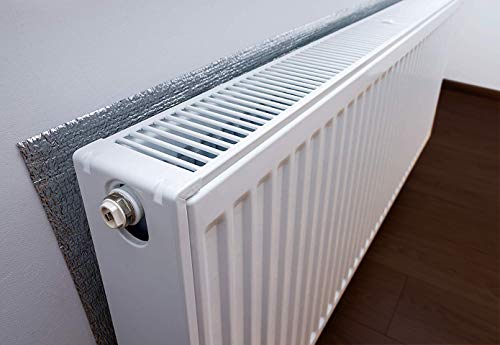
Easy to install and fits all Radiators & NO need to remove the Radiator.Improves home comfort, less wear and tear on Radiator and saves money!

Preparing the Attic Space
- Clear the Area: Remove any obstacles, debris, or stored items from the attic. This provides a clean workspace and ensures safety during installation.
- Inspect for Damage: Check for any leaks, mold, or structural issues. Address these problems before proceeding with the barrier installation.
- Measure the Space: Use a measuring tape to determine the dimensions of the attic. This helps in calculating the amount of radiant barrier material you’ll need.
Installing the Radiant Heat Barrier
- Gather Your Materials: Ensure you have the radiant barrier sheets, heavy-duty stapler, utility knife, and safety gear in hand.
- Cut to Size: Cut the radiant barrier sheets to fit the dimensions of your attic. A straight edge helps for clean cuts.
- Position the Barrier: Lay the radiant barrier sheets across the rafters, reflective side facing down. This maximizes heat reflection into the attic space.
- Secure the Sheets: Use the heavy-duty stapler to attach the barrier to the rafters. Staples should be spaced about 12 inches apart for a secure hold.
- Check for Gaps: Inspect the installation for any gaps or seams. Gaps can reduce the effectiveness of the radiant barrier.
- Seal with Tape: Use reflective tape to seal any seams and edges. This ensures an airtight fit, maximizing performance.
- Conduct a Final Inspection: Walk through the attic to confirm all areas are covered and securely fastened.
By following these steps, you’ll achieve a well-installed radiant heat barrier that enhances energy efficiency and comfort in your home.
Common Mistakes to Avoid
Installing a radiant heat barrier in your attic can enhance energy efficiency, but several mistakes can compromise the installation process.
Overlooking Attic Ventilation
Neglecting attic ventilation can trap heat and moisture, leading to mold growth and decreased energy efficiency. Install a radiant heat barrier while ensuring there’s adequate airflow. Check for vents like gable, soffit, and ridge vents. Make adjustments as needed to promote proper circulation.
Incorrect Installation Techniques
Using improper installation techniques can reduce the effectiveness of your radiant heat barrier. Secure the reflective side facing down toward your living space. Use a heavy-duty stapler to attach the barrier to the rafters tightly. Avoid leaving gaps, as they let heat seep through. Seal seams with reflective tape for a complete barrier effect. Double-check your work during the final inspection to ensure everything is secure and properly aligned.
Conclusion
Installing a radiant heat barrier in your attic is a smart move for enhancing comfort and boosting energy efficiency. With just a few materials and some straightforward steps you can create a cooler living space while saving on energy costs.
Remember to take your time during the installation process and pay attention to detail to avoid common pitfalls. Once you’ve got it in place you’ll likely notice a difference in your home’s temperature and your energy bills.
Enjoy the benefits of a more comfortable home and the peace of mind that comes with making an eco-friendly choice. Your attic will thank you!
Frequently Asked Questions
What is a radiant heat barrier?
A radiant heat barrier is a material, typically made of reflective substances like aluminum foil, that reduces heat transfer into a home. It works by reflecting radiant heat away from living spaces, making it especially effective in warm climates and improving overall energy efficiency.
How does attic insulation affect energy costs?
Inadequate attic insulation can lead to increased energy costs as heat enters the home, making air conditioning systems work harder. Adding a radiant heat barrier can enhance insulation and decrease energy consumption, resulting in potential cooling cost savings of up to 17%.
Can I install a radiant heat barrier myself?
Yes, installing a radiant heat barrier is a straightforward DIY project. With basic tools and materials, homeowners can effectively install the barrier in their attic, ensuring improved energy efficiency and comfort.
What materials do I need to install a radiant heat barrier?
You will need materials like foil-backed insulation, radiant barrier sheets, reflective paint, and reflective membranes. Essential tools include a utility knife, measuring tape, heavy-duty stapler, and safety gear for a smooth installation process.
How do I ensure proper installation of a radiant heat barrier?
To ensure proper installation, clear and prepare your attic space, measure the area, and cut the radiant barrier sheets to size. Secure them with the reflective side facing down and check for gaps or seams that need sealing to guarantee effectiveness.
What are common mistakes to avoid during installation?
Common mistakes include failing to secure the reflective side properly, leaving gaps that allow heat to enter, and neglecting adequate attic ventilation. Ensuring a clean workspace and following installation guidelines will help you avoid these issues.
What are the environmental benefits of a radiant heat barrier?
By reducing energy consumption for cooling, radiant heat barriers contribute to a more sustainable home. Using less energy decreases greenhouse gas emissions and lowers your environmental footprint, promoting energy efficiency and sustainable living.