

Are you tired of stepping onto cold floors in your basement? You’re not alone. Many homeowners struggle with chilly spaces that make them less inviting. Imagine transforming that frigid area into a cozy retreat where you can relax or entertain.
Key Takeaways
- Understanding Radiant Floor Heating: This efficient heating system radiates warmth from under the floor, creating a consistent and comfortable environment in your basement.
- Benefits: Radiant floor heating enhances comfort, improves energy efficiency, saves space by eliminating radiators, promotes better air quality, and is versatile across various flooring types.
- Preparation for Installation: Assess your basement’s suitability, addressing moisture issues, flooring types, and insulation needs before selecting between hydronic and electric systems.
- Installation Steps: Follow detailed steps including measuring and planning, laying insulation, installing heating elements, connecting the system, and setting up the thermostat to ensure effective operation.
- Post-Installation Checks: Conduct thorough tests for system efficiency, monitor temperature, and inspect for cold spots or leaks to ensure seamless operation of your heating system.
- Maintenance Tips: Regularly check the thermostat, inspect for leaks, flush the system annually, keep the flooring clean, and schedule professional maintenance to extend the system’s lifespan and maintain comfort.
Recommended Products
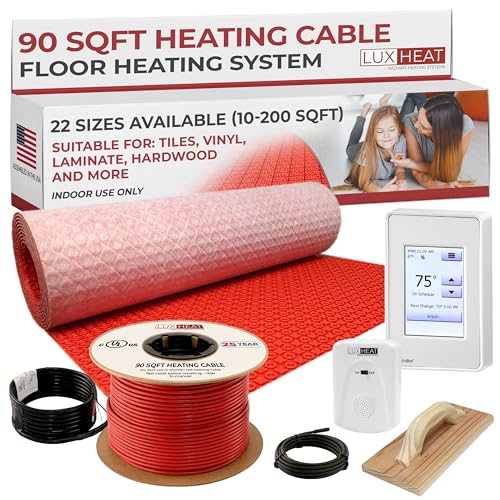
LUXURY AND COMFORT - Enjoy the warmth of LuxHeat's easy to install electric floor heating system. Electric floor heating promotes individual room control, ensuring personal comfort. Kit includes: 1x LuxHeat 90sqft (120volt) heating cable, 1x 110sqft Prova Flex-Heat uncoupling membrane, 1x Programmable Touchscreen thermostat (UDG4-4999), 1x alarm, 1x floor sensor (included with Thermostat), and 1x wood float, for decoupling membrane install.

LUXURY AND COMFORT - Enjoy the Warmth of LuxHeat's easy-to-install Electric Floor Heating System. Heating Kit Includes: 20 Sqft (120 volt) Self-Adhesive Heating Mat, Cable monitor/Alarm, OJ Microline UDG-4999 Programmable Thermostat with Floor Sensor and Built-in GFCI (Ground Fault Protection). For installation under Tile, Laminates and more.

LUXURY AND COMFORT - Enjoy the warmth of LuxHeat's easy to install electric floor heating system. Electric floor heating promotes individual room control, ensuring personal comfort. Kit includes: 1x LuxHeat 15sqft (120volt) heating cable, 1x 25sqft Prova Flex-Heat uncoupling membrane, 1x Programmable Touchscreen thermostat (UDG4-4999), 1x alarm, 1x floor sensor (included with Thermostat), and 1x wood float, for decoupling membrane install.
Understanding Radiant Floor Heating
Radiant floor heating provides an efficient and comfortable way to heat your basement. This system uses warm surfaces to radiate heat upwards, creating a cozy environment.
Recommended Products

LUXURY AND COMFORT - Enjoy the Warmth of LuxHeat's easy-to-install Electric Floor Heating System. Heating Kit Includes: 2x 120volt Self-Adhesive Heating Mats (Totaling 120sqft), 2x Cable Monitors/Alarms, 1x OJ Microline UDG4-4999 Programmable Thermostat with Floor Sensor and Built-in GFCI (Ground Fault Protection). For installation under Tile, Laminates and more.

LUXURY AND COMFORT - Enjoy the Warmth of LuxHeat's easy-to-install Electric Floor Heating System. Heating Kit Includes: 45 Sqft (120 volt) Self-Adhesive Heating Mat, Cable monitor/Alarm, OJ Microline UDG-4999 Programmable Thermostat with Floor Sensor and Built-in GFCI (Ground Fault Protection). For installation under Tile, Laminates and more.

LUXURY AND COMFORT - Enjoy the Warmth of LuxHeat's easy-to-install Electric Floor Heating System. Heating Kit Includes: 50 Sqft (120 volt) Self-Adhesive Heating Mat, Cable monitor/Alarm, OJ Microline UDG-4999 Programmable Thermostat with Floor Sensor and Built-in GFCI (Ground Fault Protection). For installation under Tile, Laminates and more.
What Is Radiant Floor Heating?
Radiant floor heating refers to a heating system installed under the floor surface. It works by circulating warm water through pipes or warming electrical cables beneath the floor. The heat radiates evenly across the room, eliminating cold spots and providing consistent warmth.
Benefits of Radiant Floor Heating in Basements
Radiant floor heating comes with several advantages for basement spaces:
- Comfort: Warm floors feel great underfoot, enhancing your basement’s coziness. This warmth invites you to spend more time in the space.
- Energy Efficiency: Radiant heating systems operate at lower temperatures than traditional heating methods, reducing energy consumption and utility bills.
- Space-Saving: Without bulky radiators or vents, you gain more usable space. This allows for a cleaner and more open floor plan.
- Air Quality: Radiant systems don’t disrupt dust and allergens like forced air systems, promoting better indoor air quality.
- Versatile Installation: You can install radiant heating in various flooring types, including tile, stone, and even carpet.
These benefits make radiant floor heating a worthwhile consideration for transforming your basement into a warm, inviting area.
Preparing for Installation
Preparing effectively for radiant floor heating installation ensures a smooth process and ideal results. You need to assess your basement’s suitability and choose the right system.
Assessing Your Basement’s Suitability
Assess your basement’s specific characteristics before installation. Check for moisture issues; damp basements may require additional waterproofing solutions. Evaluate the existing flooring; concrete floors work best, while wood or tiles may need modifications. Measure the square footage to determine the amount of materials required. Inspect ceiling height to ensure adequate space for the heating system.
Choosing the Right System
Select a heating system that fits your needs. Decide between hydronic and electric systems. Hydronic systems circulate heated water through pipes, which are ideal for larger areas. Electric systems use wires or heating mats, suitable for smaller spaces or areas with less heat loss. Consider your basement’s insulation and floor covering to enhance efficiency. Research product options based on energy efficiency ratings, warranties, and customer reviews to make an informed choice.
Installation Process
Installing radiant floor heating in your basement transforms the space into a comfortable haven. Follow these detailed steps for an effective installation.
Recommended Products

For use in hydronic radiant heating and cooling systems

For use in hydronic radiant heating and cooling systems

RECOMMENDED FOR USE WITH EASYFLOOR HEAT PLATES, FLOORHEAT DISTRIBUTION PANELS, AND 1/2" PEX-AL-PEX: This product is designed to seamlessly integrate with the EasyFloor Heat Plate, and a Floorheat Distribution Panel, ensuring optimal performance. Together, these components create a highly efficient and cohesive radiant heating system, maximizing energy savings and comfort.
Required Tools and Materials
Gather these essential tools and materials before starting your installation:
Tools:
- Measuring tape
- Level
- Utility knife
- Staple gun
- Drill and bits
- Pliers
- Bender for piping (if using hydronic system)
Materials:
- Radiant heat tubing (for hydronic systems) or electric heating cables
- Insulation boards
- Thermal barrier, if needed
- Concrete or self-leveling compound (for hydronic systems)
- Suitable flooring (e.g., tile, laminate)
- Prepare the Basement:
- Clear the basement space and remove old flooring.
- Inspect for moisture and fix any issues.
- Ensure the basement’s ceiling height meets your needs after flooring installation.
- Measure and Plan:
- Measure the square footage to determine the amount of heating material.
- Design the layout for tubing or cables, ensuring even coverage.
- Install Insulation:
- Lay insulation boards on the concrete subfloor to boost energy efficiency.
- Seal seams with tape for a tight fit.
- Lay Heating Elements:
- For hydronic systems, secure tubing with anchors or staple it to the insulation.
- For electric systems, lay cables according to the planned layout.
- Connect the System:
- For hydronic systems, connect the pipes to a boiler or manifold.
- For electric systems, connect the heating cables to the thermostat following the manufacturer’s instructions.
- Pour Concrete or Self-Leveling Compound (for Hydronic Systems):
- Cover tubing with a concrete layer or self-leveling compound to protect it and enhance heat distribution.
- Allow for Curing:
- Let concrete cure completely before proceeding. This may take several days.
- Install Flooring:
- Once cured, install the chosen flooring over the heating system. Follow the flooring manufacturer’s guidelines for compatibility with radiant heating.
- Setup Thermostat:
- Program and set up the thermostat for optimal temperature control.
- Test the System:
- Activate the heating system and check for even warmth across the basement floor. Adjust settings as needed.
Following these steps ensures a successful radiant floor heating installation, creating a warm and inviting basement space.
Post-Installation Considerations
After installing radiant floor heating, focus on testing the system and maintaining it for optimal performance. Proper care enhances efficiency and extends the system’s lifespan.
Testing Your System
Testing your radiant floor heating system ensures it operates efficiently. Follow these steps:
- Check Connections: Confirm all connections are secure, especially for hydronic systems. Look for leaks in pipes or fittings.
- Power the System: Turn on your thermostat and set it to a comfortable temperature. Monitor the system to ensure it starts heating the floor.
- Measure the Temperature: Use a thermometer to check the floor temperature after the system runs for a while. The floor should feel warm but not uncomfortably hot.
- Inspect for Cold Spots: Walk around the floor to identify any cold areas. Inconsistent heat may indicate installation issues that need addressing.
- Monitor Performance: Over the first few days, observe the system’s performance. Adjust the thermostat settings as necessary until you achieve your desired comfort level.
Maintaining Radiant Floor Heating
Regular maintenance keeps your radiant floor heating system in top shape. Follow these tips:
- Check the Thermostat: Regularly inspect your thermostat settings and functionality. Make sure it accurately reflects the floor temperature.
- Inspect for Leaks: For hydronic systems, routinely check pipes for leaks. Even minor leaks can lead to water damage or increased energy bills.
- Flush the System: Annually, consider flushing the system to remove air pockets. This helps maintain even heating and prolongs the system’s life.
- Clean Regularly: Keep flooring clean to prevent dirt buildup that could impact heat transfer. Vacuuming or sweeping helps maintain efficiency.
- Schedule Professional Maintenance: Consider hiring a professional for an annual inspection. They can identify potential issues and ensure everything functions correctly.
By testing and maintaining your radiant floor heating system, you create a comfortable, inviting basement retreat for years to come.
Conclusion
Transforming your cold basement into a cozy retreat is truly achievable with radiant floor heating. By following the steps outlined in this guide you can create a warm environment that invites relaxation and enjoyment.
Remember to take your time during the installation process and pay attention to details like moisture issues and insulation. Once everything’s set up be sure to test and maintain your system regularly for optimal comfort.
With a little effort you’ll have a basement that feels welcoming and comfortable all year round. Enjoy your new warm space and the countless moments you’ll share there!
Frequently Asked Questions
What causes cold floors in basements?
Cold floors in basements typically result from poor insulation and the natural temperature of the earth beneath the home. Basements are often below ground level, making them susceptible to cold air. Additionally, cold concrete floors can absorb and retain chill, making the space uncomfortable.
How does radiant floor heating work?
Radiant floor heating works by installing heating elements or tubes beneath the floor surface. These systems circulate warm water or use electrical cables to radiate heat upwards, warming the floor and creating a cozy environment in the basement.
What are the benefits of radiant floor heating in basements?
Benefits of radiant floor heating in basements include enhanced comfort with warm floors, improved energy efficiency, space-saving design by eliminating bulky radiators, better air quality by reducing dust and allergens, and versatile installation options for various flooring types.
How should I prepare my basement for radiant floor heating installation?
Preparation involves assessing moisture levels, evaluating existing flooring, measuring square footage, and checking ceiling height. It’s essential to choose the appropriate heating system—either hydronic or electric—based on the basement’s characteristics and insulation.
What tools do I need for installing radiant floor heating?
You’ll need basic tools like measuring tape, insulation boards, heating elements, a saw, and a level. Specific materials will depend on whether you choose hydronic or electric systems, but concrete or self-leveling compound may also be necessary for hydronic installations.
How long does it take to install radiant floor heating?
The installation time can vary based on the project’s complexity, but typically it takes one to three days. This includes preparation, installation of heating elements, pouring concrete or self-leveling compound, and allowing time for curing before setting up flooring.
How can I maintain my radiant floor heating system?
Regular maintenance includes checking the thermostat, inspecting for leaks, flushing the system once a year, keeping the flooring clean, and scheduling professional maintenance. This ensures the system operates efficiently and provides a comfortable environment in your basement.
What should I do after installing radiant floor heating?
After installation, test the system by checking connections, powering it on, measuring the floor temperature, and inspecting for cold spots. Monitor the system’s performance over the first few days to ensure everything works optimally and make adjustments as necessary.
